Showing posts with label Blogger. Show all posts

Ways To Customize Your Blogger Template

Ways To Customize Your Blogger Template

Before you decide to make any changes or modifications be sure that you first backup the template that is on your current blog. This way you can revert back to it whenever needed. There are a couple of ways in which you can customize your template for your blog.

Ways To Customize Your Blogger Template:

Upload XML Files


You will find that it is very easy to upload XML Files and all that it requires is for you browse your computer and then upload the XML File.

Directly edit the HTML

You can research “Free Blogger Templates”on Google and you will find many of them and can customize those templates. Here are a few examples of free blogger templates online:

  • Underfire
  • Whitesmoke 1306
  • Online Marketer
You will find a plethora of free templates that look great but you can also buy a premium blogger template cheap online.

How To Backup your Current Blog’s Template?

You will find that it is very easy to backup your blog template. You will need to first sign into your Blogger account and then click on the button that says layout. Example:

  1. Look underneath the option for editing html and you will find “Download Full Template”.
  2. Click on that part and you will then save your current template and won’t have to worry about losing it.
How To Edit, Enable or Disable Your Blogger Profile?

If you have a blog that is attractive and good then you should have no problems with getting traffic to your blog. A profile also reflects the type of personality that you have plus your interest and many other things.

Look on your edit profile that is on your blogger dashboard. You can select private or personal settings if you want your profile to be private. You can also change the display name that appears near the end of all blog posts.

Uploading images might be tricky at first but easy to understand after you figure it out. You cannot download images from your computer. You must have it downloaded somewhere on the web and in order to do that you will need to sign up and find a free image hosting site online.

After you have signed up then you can get the direct code for the image and put it in the Photo box and then your image will show up.

How To Delete Or Edit Previous Blogger Posts?

All you need to do in order to delete or edit former blogger posts is just click on the post link located on the dashboard. You will then see all of the posts that you have made and then you can edit those posts or delete them or either add in labels.

Blogger Tip: One way to get traffic to your blog is with staying active in the Blogger community and leave useful comments on other blogs. People enjoy reading a nice comment because it took them time to make that blog just like it does for you.

Conclusion


Having a blog is so much fun. You will find that you can do so many things with a blog. You can use a blog for business or use it for personal reasons. You will find that blogging gets addicting after you get the hang of it.

Autor Bio: Luke Hill, Blog Consultant, has been successfully blogging for SEO Services by SmithSEO.He quit his day job because of blogging.
 

6 Steps to Get a Professional Blogging Job

6 Steps to Get a Professional Blogging Job

After you have decided to become a professional blogger and get paid for blogging then you will need to figure out what kind of experience the managers might need that could be hiring bloggers. Rates change according to how much experience you have had and the more experience you gain then the higher chance you have of having a great salary.

If you would like to land a professional blogger job then simply follow these 6 Steps to Get a Professional Blogging Job because it will help to boost up your chances of getting a blogging job online.

1. What Type of Expertise Do You Have In Blogging?

People who seek after bloggers to hire them have expectations that are high. A professional blogger must create timely, fresh and content that is meaningful to their readers. They need to participate in the blogging community and provide the information readers would like to see.

First establish yourself on the subjects that might matter to you and that you have knowledge in. Once you have established yourself then you will find it easier to get a job as a professional blogger. Oftentimes people with the most experience and most qualified get the job.

2. Polish Your Blogging Skills

Make sure that you are up to date with your blogging skills. Take the time to create daily posts on topics you might be passionate about or either have knowledge in. Find out all of the tools for blogging that’s available online that can help you with your posting.

Learn how to promote your blog with using social bookmarking and also another way is to participate in online forums and on sites like Facebook.

3. Make Your Presence Known Online

Making your presence known online is vital if you want to be successful. Invest the amount of time needed to grow. Develop credibility online with joining online networking. You can use websites such HubPages or Squidoo to help you with getting out there online.

4. Search Online and Find Job Boards

Do deep searches on search engines like Google and look for blogging jobs that might be available in the area that you’re an expert in. You must be quick to apply because competition can sometimes be tough depending on what type of blogging job you want to have.

5. How Can You Add Value To The Blogging Community?

As stated above in step 4 the competition will be sometimes hard and difficult but don’t let that stop you. When applying for blogging jobs show them what type of value you can add in and how you can help their site. Let them know you can help bring in awesome content plus that you would be able to help with the promotion of their site. Add all of the blogging experience that you have and include references.

6. Provide A Writing Sample That Stands Out

Come up with a writing sample that gets their attention and stands out from other writers. Don’t link them to old and messy work that you did two years ago. Instead, do a new post and make sure that everything is accurate in it. Your post should not have any grammatical or spelling errors. Add in images and videos that might help your blog post to look unique. If you can do the videos yourself but if not then look up creative ones on places like YouTube.

Apply For Lots Of Blogging Jobs


Just don’t stop at applying for one or two professional blogging jobs if you get denied. Keep on applying for them. Sometimes even having two or three blogging jobs is great as long as you don’t get overwhelmed.

Working as a professional blogger can be a lot of fun but a lot of work at the same time. Once you get hired be sure to take breaks and don’t over do it or it might reflect on your work.

Author Bio: Jen Williamson is a Blog Developer and a professional blogger shares her talents with us at SEOServices.com.au.
 

How to Know When People Use Your Photos?

How to Know When People Use Your Photos?
Photo by Free Creative Commons/Flickr
Everyone knows about using photos of more attractive strangers to catfish unsuspecting suckers on the internet. There’s the enraged ex,posting photos of their beloved with the intent to humiliate them into reconciliation. But more often than not, photos are stolen by the lazy. Those too slack to make their own images.

It seems the only guaranteed anti-theft is to never post anything. If thieves want it, they’ll take it. Depressing, and true.

How do you know if your photos are being used by other people? These steps will guide you through a simple search of the internet to find your photos. With any luck, you’ll just find your Facebook page, Twitter feed, or Instagram account.

Are You Feeling Lucky?

You will end up with a list of all websites where your photos appear, with or without your permission. These steps are simple - follow them carefully. Here we go!

  • You are going to use the website Google to create a “Reverse Image Search”.
  • Open your internet browser.
  • Find the image you want to investigate.
  • Bring your pointer to hover over the image.
  • Use the right click function.
  • Now you will copy the URL of your image.
  • If you are using Firefox, select “Copy Image Location”.
  • If you are using Safari, select “Copy Image Address”.
  • If you are using Explorer, select ‘Properties’, highlight the “Address”, click CTRL-C.
  • Paste your image’s URL that you copied into Google and click “Search”.
  • You will get a result page and you next click “Search by Image”.
  • A grid of “Visually Similar Images” will appear.
  • Scroll down to see the image you are searching for.
  • Click on each image to take you to where your image is posted on the internet.
  • Freak out.
Aaahh, Freak Out!

Well, don’t immediately freak out. Have a look around and decide the level of freaking out per result. Of course you’ll see anywhere you have posted the image yourself. You may also see where friends or relatives have copied and posted your image. And you may even find some places that your image is posted that discusses if for some reason, hopefully a reason related to you, and hopefully not with a sour snout full of snark.

But if you find your image on a site that is completely irrelevant to you and appears to be flat-out stolen you do have a few options, some preventative, some after the fact.

Protect Yo’self!

  • Digitally watermark or emboss your photos.
  • Layer your images so thieves get only the top layer, which you’ve made clear.
  • Cut your images up and reassemble via HTML code.
But remember, no preventative measure protects you against a thief who knows about taking a screenshot. Your recourse when you find theft is to complain to the culprit...ummm, yeah. You can complain to the company who hosts the offending site. You can complain to Google. Or you can crawl into a hole and stop using the internet. Sigh. SIGH.

Author Bio: Sheila Kurdinger likes DontPayFull because they offer such a wide selection of items. She also likes to read all sorts of infographics online whenever she has a little spare time because they help her understand complex topics easily - at least the good ones!
 

Tips to Make Blogging Interesting

Tips to Make Blogging Interesting
When you start blogging you need to try your best to make sure that the process is daily. However, daily blogging can become tiring and you might find yourself getting burned out and this will reflect in your writing. Keeping up with the maintenance of your blog is important.

How can you learn how to design your own blog and keep up with blogging passionate daily? Here are a few tips that might help you with making your blogging unique and interesting.

Tip 1: Decide What Direction You Want Your Blog To Go In

Try your best to organize your mind. Implement the ideas you have that you want to blog on and write down those ideas in your personal journal so you won’t forget them. Think about what things you want to offer with your blogs and what the audience needs.

Write blogs that have information on them that’s good and unique. What will entertain your readers on your blog or enlighten them? Write on a certain niche and have all of your goals relevant to the niche that you are blogging on.

Tip 2: Find Out Your Competition

Almost all niches and blogs have some sort of competition out there. The web has thousands of websites and blogs. You don’t need to scan the competition that you have every day just try and do it sometimes.

Read other blogs and interact with the bloggers and get ideas that will help you to know what they might be doing and how you can do the same on your blog. This will help with creating links back and forth and you will be able to create a blogging network which will bring in more traffic to your blog.

Tip 3: Try To Not Be Like The Other Bloggers


Sometimes it can be hard finding out how you can be unique and stand out in the crowd but you need to if you want to stay on top of the competition. Doing things in a different way is another great way to get new readers. Reading something that looks different is fun and they will remember your blog.

Offer readers a chance to receive free products or either have contests but make sure that you fulfill these contests. There have been some blogs that say they will have contests to get readers but never come thru with it and word gets around on what blogs don’t stick to their promises and you don’t want to be known as the bad blogger who doesn’t hold real contests so only have contests if you know for sure you can deliver the prize.

Posting series is also something else people enjoy. It gives them some excuse to come back and read your blog again. Find out some unique techniques that you can do to customize these type of posts.

Tip 4: Create A Blogging Network

Create deadlines for yourself and update your blog regularly. Find bloggers that do the same as you. Connect with bloggers that appear to be active and post daily. Try your best to connect with them and see if you can share links with each other.

Visit and leave comments that are excellent on other blogs. Try your best to not make the comment look spammy. People will delete your comment right away if it looks like you are trying to promote your blog. Talk about the blog and show that you actually read and took interest in it.

Improve Your Blog By Looking At Other Blogs

Take time out to see how other blogs might be doing better than your blog. You don’t have to just stick with your competition to do this. Review the most popular blogs online and see why they are so popular. See how you can update and change your blog to help make the experience your readers have even better.

Author Bio: Jacky Anderson is continuously blogging of accidents scenes for many years. Accidents like cycle, cars,trucks and motorbike accidents. He write this article from his vast experience of blogging to help the new bloggers, so that they can actually do something good in this field.
 

How To Start A Blog Today?

How To Start A Blog Today?
Photo credit: Konstantinos Kottinis
If you are looking into creating your own personal blog and might not know how to start then hopefully this tutorial can help you. There are a couple of options that you have. You can either hire a professional to help you or you can save money and do it yourself.

How can you make your own blog? There are many things that you need to consider and think about such as the design. If you are wondering how to desing your own blog then the tips below should also help you. Just remember that you don’t have any limitations with your blog except for the limitations and rules that might come from doing it online.

Let’s go ahead and talk about how you can start your blog today and have a successful blog.

How to start a blog today:

1. Pick out your domain name and hosting

If you want to have a great blog not only do you need to think about the design but you must think about the domain name. It’s important to come up with a domain name that people will like and can easily remember.

Hosting is the next thing to think about after you have picked out your domain name. There are many hosting packages and hosting companies available ready to help you with hosting your domain. Read the reviews and hosting packages and see what hosting package is the best for you.

2. Install WordPress

Installing WordPress is easy and you can do it with the one click install and have it on your site within a few seconds. The reason why I recommend WordPress is because it has a lot of features that you will enjoy and you can easily design and create your blog plus post on it at ease.

You don’t need to have any experience with blogging if you use WordPress. Once you install it and start using it you will be amazed at how you can get around and do things without having any problems.

3. Learning The Basics of WordPress

Once you get access to WordPress you will notice that a default theme is put in there right away. You can go to the right sidebar and change the default theme.

Here is the dashboard of what WordPress will look like:

Just by looking at the picture should give you an idea as to how easy WordPress is and you can easily change the theme with simply clicking on the appearance. Now, one awesome thing is that WordPress has many awesome free themes or you can find the theme that you like and upload it easily and then install it on your site.

Other things to check out on WordPress:

  • Links. The links on WordPress help you with being able to customize the sidebar widgets that you might want to have on your site and they can help you out with other things. 
  • Plugins. You will find that plugins can be extremely useful and WordPress has a variety of them. It can help you with the style of your site, performance and plugins can give you features that you might need that WordPress might not offer. 
  • Pages. Adding in pages is easy and you’ll be amazed at how fast you can get a page up using WordPress.
Conclusion

You will find many helpful tutorials and videos on the web that will help you with setting up WordPress. Many skilled and beginners use WordPress just because of how user friendly it is and because of all the awesome features that comes with it. If you are a beginner then WordPress might be the best choice to help you with learning how to blog.

Author Bio: Judy Henderson is a lover of jewellery. She is buying gold coins and bullion online for last 2 years.
 

The Essential Ins and Outs of Learning SEO - 3 Tools for the Best Results

The Essential Ins and Outs of Learning SEO - 3 Tools for the Best Results

SEO, which stands for Search Engine Optimization is a fascinating and game-changing industry. It combines basic business principles, adding in internet codes and various metric algorithms—all to form one of the leading components in the marketing industry.

SEO is an important part of today’s internet marketing strategy—allowing individual websites to receive better web visibility and traffic. As more people are going online, the demand for SEO marketing services continues to grow exponentially.

It’s a fast-paced business that is constantly changing to keep up with Google’s updates (algorithms such as Penguin), which helps to enforce having high-quality content throughout the web.

Those new to this industry can feel lost at first, but there are many useful tools are available—most of which are for free. They read all of the backend specs of websites; including: page ranks, backlinks, IP addresses, etc.

Here are several essential SEO programs worth having:

1. Either Moz or SEO Quake for Reading Analytics 

Moz (previously branded as SEOMoz) and SEO Quake are both popular analytic programs. Moz offers a Toolbox page that inserts a site’s specs right below the URL. It is a neat feature to have and allows a clear display of all of the site’s information. Moz offers a wide-variety of SEO features; however, they all require paid accounts.

On the plus side, Moz provides free guides and information to anyone looking for additional SEO information. The Beginner’s Guide to SEO is one to add to your bookmarks tab. To chat with other SEO professionals, Moz includes an extensive free blog forum, allowing SEO marketers to connect over a variety of topics and issues.

A completely free alternative to Moz, SEO Quake is a useful, reliable free alternative to Moz. While it doesn’t have nearly as many bells and whistles, it provides great services and accurate analytic tools.

The Essential Ins and Outs of Learning SEO - 3 Tools for the Best Results

2. Google AdWords for Key Word Research

While Google AdWords provides pay-per-click (CPC) advertising, it also displays relevant keywords used by internet users. With this tool, finding relevant search terms are no longer just a guessing game.

It’s a simple tool that makes online marketing not only easier, but helps to narrow down and focus on specific web searches. Just enter either your product name or URL and relevant keywords will be displayed with their estimated web traffic results.

The Essential Ins and Outs of Learning SEO - 3 Tools for the Best Results

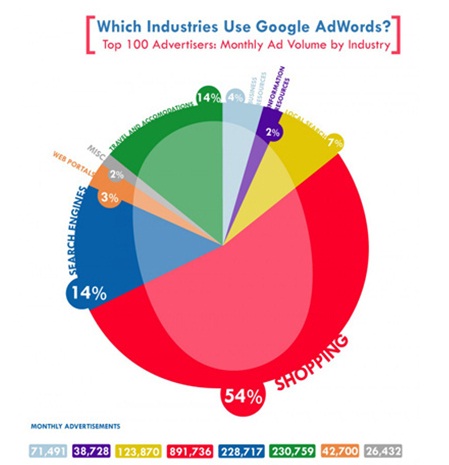
Here is a closer look at which industries use Google AdWords:

Since SEO specialists must market their clients throughout the web, and that 54% of businesses use Google AdWords for shopping purposes, it is crucial to use this tool to better market and rank higher within the search engines.
The Essential Ins and Outs of Learning SEO - 3 Tools for the Best Results

3. Google+ for creating an Online Social Identity

For SEO specialists who do guest blogging, this means needing to get on the bandwagon and use Google+ to receive Google Authorship—which will create a boost in rank search results.

Anything blogged about needs to be seen by web traffic— otherwise SEO specialists are simply blogging and getting their content lost in the realms of cyberspace.

The Essential Ins and Outs of Learning SEO - 3 Tools for the Best Results

In previous years, many users were skeptical about the purpose of using Google+, but it has quickly skyrocketed— becoming the second most active social media network. Trails right behind Facebook. A report from the Global World Index showed that Facebook at 693 million active users in December of 2012; compared to 343 million users on Google+.

Be sure to use author tagging by first creating a Google+ profile, then link all email addresses used within the profile. Under the Google+ profile page, there is a “contribute to section, which you can list any site you have contributed to.

It’s an easy process which will reap many beneficial results to your SEO campaigns.

Keep in mind that there are many other SEO tools and social media outlets that can be utilized to boost SEO results; however, the three mentioned above provide a solid-footing to succeed in this very large, yet specific marketing sector.

This industry is an ever-changing experience that allows constant professional growth. Relying on these valuable tools is truly essential in a fast-paced industry where the game constantly changes.

Author Bio: Andrea Fisher is an online marketer and content specialist for DTV’s High Speed Internet Packages.  She is a published journalist & blogger with an English degree and political science minor from the University of North Carolina at Greensboro.
 

Chatwing, A Free Live Chat Widget for Blogs and Websites

Chatwing is a free live chat widget for bloggers, websites, or any web page. It has many customization features and people have said it is the most sophisticated free chat tool they have seen.

Chatwing, A Free Live Chat Widget for Bloggers and Websites

The Reliable and Professional Chatwing Experience

If cars can take us into different places, websites can do the same on the level of information and data relay. Websites are even faster - in just a single click, you can access tons of data in all niches imaginable. This is the reason why many people are choosing online transactions over physical ones. Internet saves time and it is a precursor to anyone’s success. Do you want to take your website chat experience to a new level?

A chat app known as Chatwing can give you a refreshing communication experience. The chatroom is trendy and appeals to younger generations. Aside from that, Chatwing tool can even be used by online marketing professionals from various niches. Registration is easy: you just need to input your email address and desired password. There is no need to wait for confirmation links or messages. After that, you can now edit the appearance of the chatroom in the account dashboard. Colors and sizes can be adjusted freely, based on your preferences.

Chatwing, A Free Live Chat Widget for Bloggers and Websites

Background image upload is another unique feature of the Chatwing tool. There are background images to choose from, but you can upload an image of your choice. This can be an image of your favorite animal, or your direct market brand. This is the reason why Chatwing app can be used for any branding or rebranding purpose. The chat tool has three form factors or styles: actual shoutbox, pop-up window, and vanity URL. With such flexibility, you can tweak the chat box experience all the time.

Dealing with obnoxious members is also a breeze in the Chatwing tool. Have you ever encountered trolls in any chatroom? Many people consider them as nuisances to any conversation or topic. Take care of these trolls by banning them and determining how long they will be blocked from the chatroom. Block them for days, if you wanted to. Alternatively, you can block them through their social media account usernames.

Social media connectivity is also a strong factor of the Chatwing chat software. Now, users can log in with Facebook, Twitter, Google, or Yahoo accounts. Registered Chatwing users can also use their login data easily. Chatwing is currently making a name and reputation in the blogosphere and other online niches. Take control of this opportunity at any time you want.
 

How to Enable Google+ Comments for Blogger even Using Custom Template?

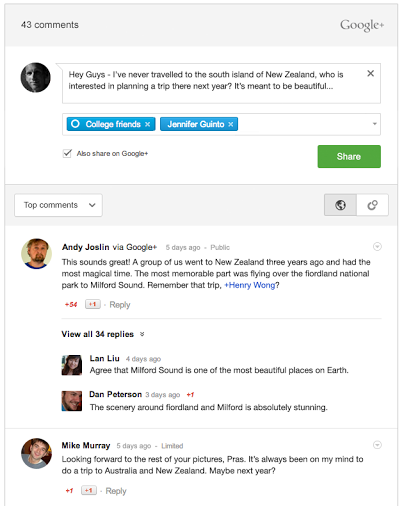
Google+ Comments is an best alternative to the default commenting system on Blogger, available to blog authors who have upgraded their Blogger profile to Google+. Google+ Comments look similar to traditional Blogger comments, but have some important differences with more features.
How to Enable Google+ Comments for Blogger
How to enable Google+ Comments for your Blogger blog?
  • Goto Blogger dashboard
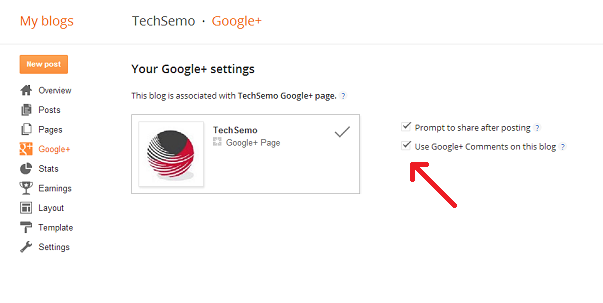
  • If you haven’t upgraded your Blogger profile to a Google+ profile and would like to do now, you can start the process by clicking the Google+ tab on the Blogger dashboard.
  • Once your blogs linked to a Google+ profile, a new setting's will be displayed on the Google+ tab of your blog. 
  • Just check the "Prompt to share after posting" and "use on this blog" check boxes.
  • That's it you have successfully enabled Google+ comments for your blog.
How to Enable Google+ Comments for Blogger

If you are using custom template on your blog, Just follow the steps to add the Google+ Comments box widget in your template:
  • Go to blogger dasboard > Template > Edit HTML > Format Template and find the below code
<div class='post-footer'> 
  • Just below of it, paste the following code
<div class='cmt_iframe_holder' expr:data-href='data:post.canonicalUrl' expr:data-viewtype='data:post.viewType'/>
  • Click on Save template button, That's it.
Unfortunately, we cannot guarantee the experience with heavily customized templates.

Important Notes for Blog Authors from Google

1. What happens to existing comments when enable Google+ Comments?
  • If you use Blogger’s commenting platform, existing Blogger comments will stay on your blog, and you’ll continue to have the option to delete or mark them as spam.
  • If you use a third-party commenting system, such as Disqus or any other, sorry your comments will not be retained when you enable Google+ Comments.
2. What if readers does not have a Google+ profile or page? Can they still comment?
  • Sorry , your readers must have Google+ profile or page, when they attempt to comment.
3. How to Moderate Google+ Comments?
  • you can moderate comments within the blog post itself. The Comments tab that you previously used to moderate comments will be removed from your Blogger dashboard.
  • You can moderate comments by clicking on the drop-down arrow next to the comment, or by hovering over the comment and clicking the "X" that appears.
  • Automatically hide the spam comments, and you can review and edit them in bulk.
  • As a blog author, you can choose to remove comments from your blog if that comment is shared publicly, or with you. However, if that comment is also shared in Google+, you won’t be able to remove it from Google+.
Source
 

Google Rolled Out Google+ Comments Plugin for Blogger Blogs

Google launched Google+ Comments system for Blogger blogs, Google+ Comments is an alternative to the default commenting system on Blogger, available to blog authors who have upgraded their Blogger profile to Google+ Profile or Page. Google+ Comments look similar to traditional Blogger comments, but have some important differences.

Google Rolled Out Comments Plugin for Blogger Blogs

Here the Complete Features of Google+ Comments
  • When you leave a comment on a blog, you'll see the option, checked by default, to also share that comment to Google+.
  • Google+ posts that link to blog posts will show up as a comment underneath those blog posts
  • If original comment is shared to Google+, replies to the comment on the blog will show up in Google+ and vice versa, but only to the people that the original comment was shared with
  • If a comment is not shared with the blog author, the blog author will not be able to see the comment in either location
  • As the author of a post, you’ll receive Google+ notifications when readers comment on or share your blog post. Source
Google+ Comments Plugin for Blogger Blogs

Click here to know how to enable Google+ comments for your blog even using Custom Template?
 

Google Inc Adds Google Plus Pages and Blogger in Google Takeout

Google Takeout is a project by the Google Data Liberation Front that allows users to download there data's from other Google services like Google Drive, Buzz, Youtube and many more. Here is the good news for bloggers that Google Takeout team includes Google Plus Pages and Blogger now.

Google Takeout Adds Google Plus Pages and Blogger

Now you can export blog or a page of your choice as an Atom Xml file with Google Takeout, also you can download html files with your posts and json files containing the circles for each Google+ Page you own.

How to Export
  • Goto https://www.google.com/takeout
  • Choose one of the service
  • Then, Follow the Instructions
  • That's all.
Have a Doubt, ask me via comment section without hesitate. Thank you!
 

Top 10 Highest Earning Blogs in the World 2013

These blogs are earning a lot through Google Adsense. Through these blogs you can learn a lot. just go through these blogs everyday and learn the key points from those blog. Just see the presentation level of these blogs. Just see what are the great things they are writing in there blogs. Here below the top 10 list of earning blogs through internet. These blogs are not getting this position over the night. They are worked and still working very hard and spent there times to this.
Top 10 earning Blogs In The World 2013
10. CopyBlogger

CopyBlogger


Founder: Brian Clark in year 2005
Earning Per Month: $18,000
Alexa Rank: 3779
Page Rank:
Link: http://www.copyblogger.com/

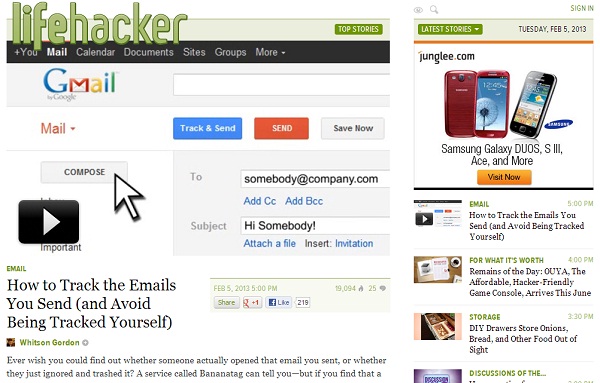
9. Life Hacker.com

Life Hacker.com


Founder: Gina Trapan in year 2005
Earning Per Month: $20,000
Alexa Rank: 631
Page Rank: 7
Link: http://www.lifehacker.com/

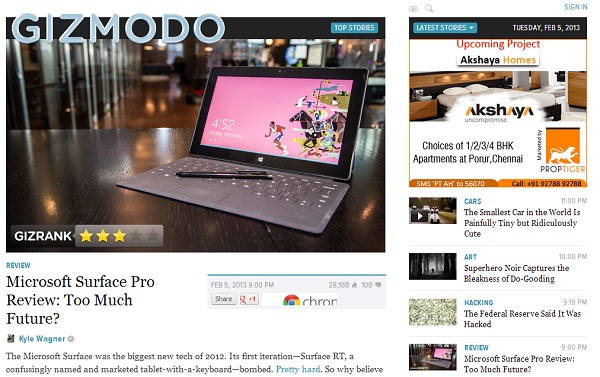
8. Gizmodo.com

Gizmodo.com


Founder: Peter Rojas in year 2002
Earning Per Month: $22,000
Alexa Rank: 746
Page Rank: 8
Link: http://www.gizmodo.com/

7. Techcrunch.com

Techcrunch.com


Founder: Michel Arrington in year 2005
Earning Per Month: $25,000
Alexa Rank: 487
Page Rank: 8
Link: http://www.techcrunch.com/

6. Cracked.com

Cracked.com


Founder: Jack o'brien in year 2007
Earning Per Month: $30,000
Alexa Rank: 801
Page Rank: 7
Link: http://www.cracked.com/

5. Engadget.com

Engadget.com


Founder: Peter Rojas in year 2004
Earning Per Month: $40,000
Alexa Rank: 391
Page Rank: 8
Link: http://www.engadget.com/

4. Mashable

Mashable


Founder:
Pete Cashmore in year 2005
Earning Per Month: $80,000
Alexa Rank: 319
Page Rank: 8
Link: http://www.mashable.com/

3. Slate.com

Slate.com


Founder: Michel Kinsley in year 1966
Earning Per Month: $1,00,000
Alexa Rank: 893
Page Rank: 8
Link: http://www.slate.com/

2. Yardbarker.com

Yardbarker.com


Founder: Pete Vlastellica in year 2006
Earning Per Month: $2,00,000
Alexa Rank: 2747
Page Rank: 6
Link: http://www.yardbarker.com/

1. Huffingtonpost.com

Huffingtonpost.com


Founder: Arianna Huffington in year 2005
Earning Per Month: $8,00,000
Alexa Rank: 87
Page Rank: 8
Link: http://www.huffingtonpost.com/

The revenue's of the websites are calculate approximately. So it is not 100% accurate.

In the end i want to say that if you go through these sites you are surly going to learn something new. So hope best and have a good luck..
 

'Have You Enjoyed? Kindly Share This With Your Friends' - Beautiful Shareaholic Blogger Widget to Increase Your Traffic!

'Have You Enjoyed? Kindly Share This With Your Friends' - The best, beautiful and most important widget for every blog/website. This type widget catches great attention of every visitor and forces them to share your articles with there friends. This widget is very uselful to increase your traffic.

Blogger Widget to Increase Your Traffic!
DEMO

How to Add This To Blogger - 10 Easy Steps to Follow

  • Go to Blogger and Template
  • Backup your template and Save it into your machine
  • Click Edit HTML
  • Check the Expand Widget Templates Check box
  • Search for the code: ]]></b:skin>
  • Just above, Paste the following code: 
div.shr-bookmarks{margin:20px 0 8px;clear:both !important;display:block !important}div.shr-bookmarks ul.shr-socials{width:100% !important;margin:0 !important;padding:0 !important;float:left !important}div.shr-bookmarks ul.shr-socials{background:transparent none !important;border:0 none !important;outline:0 none !important}div.shr-bookmarks ul.shr-socials li{display:inline !important;float:left !important;list-style-type:none !important;padding:0 !important;height:29px !important;width:60px !important;cursor:pointer !important;margin:3px 0 0 !important;background-color:transparent !important;border:0 none !important;outline:0 none !important;clear:none !important}div.shr-bookmarks ul.shr-socials li:before,div.shr-bookmarks ul.shr-socials li:after,div.shr-bookmarks ul.shr-socials li a:before,div.shr-bookmarks ul.shr-socials li a:after{content:'' !important;}div.shr-bookmarks ul.shr-socials a,div.shr-bookmarks ul.shr-socials a:hover{display:block !important;width:60px !important;height:29px !important;text-indent:-9999px !important;background-color:transparent !important;text-decoration:none !important;border:0 none !important}div.shr-bookmarks ul.shr-socials a:hover,div.shr-bookmarks ul.shr-socials li:hover{background-color:transparent !important;border:0 none !important;outline:0 none !important}.shareaholic-show-on-load{display: block !important;}div.shr-bookmarks div.shr-getshr{line-height:20px !important;padding-left:8px !important;float:left !important;}div.shr-bookmarks div.shr-getshr a{width:auto !important;font-size:10px !important; text-indent:0px !important;text-decoration:none !important;}div.shr-count{font:12px bold,arial !important;position: relative !important;}div.shr-count-outline{position: absolute !important;color: white !important;}div.shr-count-center{position: absolute !important;color: blue !important;}li.shr-2{background-position:-120px bottom !important}li.shr-2:hover{background-position:-120px top !important}li.shr-3{background-position:-180px bottom !important}li.shr-3:hover{background-position:-180px top !important}li.shr-5{background-position:-300px bottom !important}li.shr-5:hover{background-position:-300px top !important}li.shr-7{background-position:-420px bottom !important}li.shr-7:hover{background-position:-420px top !important}li.shr-10{background-position:-600px bottom !important}li.shr-10:hover{background-position:-600px top !important}li.shr-38{background-position:-2280px bottom !important}li.shr-38:hover{background-position:-2280px top !important}li.shr-40{background-position:-2400px bottom !important}li.shr-40:hover{background-position:-2400px top !important}li.shr-43{background-position:-2580px bottom !important}li.shr-43:hover{background-position:-2580px top !important}li.shr-52{background-position:-3120px bottom !important}li.shr-52:hover{background-position:-3120px top !important}li.shr-74{background-position:-4440px bottom !important}li.shr-74:hover{background-position:-4440px top !important}li.shr-88{background-position:-5280px bottom !important}li.shr-88:hover{background-position:-5280px top !important}li.shr-106{background-position:-6360px bottom !important}li.shr-106:hover{background-position:-6360px top !important}li.shr-201{background-position:-12060px bottom !important}li.shr-201:hover{background-position:-12060px top !important}li.shr-236{background-position:-14160px bottom !important}li.shr-236:hover{background-position:-14160px top !important}li.shr-304{background-position:-18240px bottom !important}li.shr-304:hover{background-position:-18240px top !important}li.shr-309{background-position:-18540px bottom !important}li.shr-309:hover{background-position:-18540px top !important}
  • Search for the code: <data:post.body/>
  • Just below, Paste the following code: 
<b:if cond='data:blog.pageType == &quot;item&quot;'>
<div class='techsemo.com' style='margin:15px 5px 0px -5px;padding:15px 0px 0px 5px;border-top:2px solid whiteSmoke;border-bottom:2px solid whiteSmoke;'>
<center><b><span style='color: #199C2E; font-family: salsa; font-size: 20px;'>Have You Enjoyed? Kindly Share This With Your Friends and Tell Us What You Think..! get this</span></b></center><div class='shr_class shareaholic-show-on-load'>
</div><script type='text/javascript'>
var SHRSB_Settings = {&quot;shr_class&quot;:{&quot;src&quot;:&quot;http://www.shareaholic.com/media/css/styles/sb&quot;,&quot;link&quot;:&quot;&quot;,&quot;service&quot;:&quot;304,5,7,38,3,88,309,2,40,236,43,39,78,10,106,45,210,219,52,74&quot;,&quot;apikey&quot;:&quot;6ffe2cbf142c45bd4cd03b01ec46b8658&quot;,&quot;localize&quot;:true,&quot;shortener&quot;:&quot;google&quot;,&quot;shortener_key&quot;:&quot;&quot;,&quot;designer_toolTips&quot;:true,&quot;twitter_template&quot;:&quot;Some fancy post title - http://goo.gl/dbqlx via @techsemo&quot;}};
</script><script type='text/javascript'>
(function() {var sb = document.createElement(&quot;script&quot;); sb.type = &quot;text/javascript&quot;;sb.async = true;sb.src = (&quot;https:&quot; == document.location.protocol ? &quot;https://dtym7iokkjlif.cloudfront.net&quot; : &quot;http://cdn.shareaholic.com&quot;) + &quot;/media/js/jquery.shareaholic-publishers-sb.min.js&quot;;
var s = document.getElementsByTagName(&quot;script&quot;)[0]; s.parentNode.insertBefore(sb, s);
})();</script></div></b:if>
  • Replace @techsemo with your twitter account.
  • Save your template and enjoy - You are done!
Important: Please take a backup before every changes of your template. Because the backup could recover your template from any error while editing or adding widgets.

This Widget for Blogger would display on post pages only and it wont display on homepage and Other pages. You can surely ask for our help which would be no less than a pleasure. Please ask us any query you may have in the comment section below.

This widget is fully designed by Shareaholic developers and full credits goes for them. We make some style on it and just given guidance for how to install it into a blogger, Thank you.
 

How to Check your Website Page Loading Speed? [Online Tool]

Are you feel that your blog/website takes more time to load, because no one likes slow websites. If your blog/website is slow, readers wont come again to your blog/website and finally you loose your valuable readers. so what is the solution for these websites or a blog owner's to reducing page load times and increase conversion rates?, There are many online tools available in internet world to check blog/website loading speed and some of them fake too. So we research on most of the tool and finally we got three best, free and also a safety tools for check blog/website opening time.

How to Check your Website Page Loading Speed?

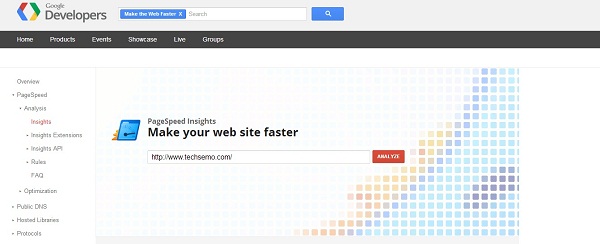
1. Google's Page Speed

PageSpeed developed by Google that Insights analyzes the content of a web page, then generates suggestions to make that page faster. Reducing page load times can reduce bounce rates and increase conversion rates.. This tool is also available as a browser extension for Chrome and Firefox.

Google's Page Speed

Link: https://developers.google.com/speed/pagespeed/insights

2. Pingdom

Pingdom is a popular tool offers cost-effective and reliable server, network and website monitoring. They use a global network of servers to monitor our customers' sites 24/7, all year long. The service includes statistics for uptime and response time, and can send out alerts via SMS, email, and more.

Pingdom

Link: http://tools.pingdom.com/fpt/

3. WebPageTest

WebPagetest is an open source tool that is primarily being developed and supported by Google as part of our efforts to make the web faster and tool was riginally developed by AOL for use internally and was open-sourced in 2008 under a BSD license. Can run simple tests or perform advanced testing including multi-step transactions, video capture, content blocking and much more.
WebPageTest

Link: http://www.webpagetest.org/
 

'Do You Like This Story?' - Beautiful Blogger Widget to Increase Your Traffic!

'Do You Like This Story?' - The best and beautiful widget for blogger. After making huge errors and several trials finally we managed to sketch a fully equipped blogger widget that contains Facebook Page Like, Feed subscription box, Twitter and Pinterest follow button and other social media icons. This type widget catches great attention of the visitor's and forces them to like and share your articles with there friends. This will increase your Traffic and also Increase your Email subscribers, facebook fans, twitter and Pinterest followers.

'Do You Like This Story?' - Beautiful Blogger Widget

DEMO

How to Add This To Blogger - 6 Easy Steps to Follow
  1. Go to Blogger and Template
  2. Backup your template and Save it into your machine
  3. Click Edit HTML
  4. Check the Expand Widget Templates Check box
  5. Search for the code: <data:post.body/>
  6. Just below, Paste the following code: 
<b:if cond='data:blog.pageType == &quot;item&quot;'>
<style type='text/css'>
form.feedburner {
margin: 20px 0 0;
display: block;
clear: both;
}
.Techsemostyle {
background: url(http://3.bp.blogspot.com/-lyUVA60SkUc/UFhmKT7B3PI/AAAAAAAADoI/vVJKFSTz6D0/s1600/Techsemo-email-icon.png) no-repeat scroll 4px center transparent;
padding: 7px 15px 7px 35px;
color: #666;
font-weight: bold;
text-decoration: none;
border: 1px solid #D3D3D3;
-moz-border-radius: 4px;
-webkit-border-radius: 4px;
border-radius: 4px;
-moz-box-shadow: 1px 1px 2px #CCC inset;
-webkit-box-shadow: 1px 1px 2px #CCC inset;
box-shadow: 1px 1px 2px #CCC inset;
}
.Techsemosubmit {
color: #666;
font-weight: bold;
text-decoration: none;
padding: 6px 15px;
border: 1px solid #D3D3D3;
cursor: pointer;
-moz-border-radius: 4px;
-webkit-border-radius: 4px;
-goog-ms-border-radius: 4px;
border-radius: 4px;
background: #fbfbfb;
background: -moz-linear-gradient(top, #fbfbfb 0%, #f4f4f4 100%);
background: -webkit-gradient(linear, left top, left bottom, color-stop(0%,#fbfbfb), color-stop(100%,#f4f4f4));
background: -webkit-linear-gradient(top, #fbfbfb 0%,#f4f4f4 100%);
background: -o-linear-gradient(top, #fbfbfb 0%,#f4f4f4 100%);
background: -ms-linear-gradient(top, #fbfbfb 0%,#f4f4f4 100%);
filter: progid:DXImageTransform.Microsoft.gradient( startColorstr=&#39;
#FBFBFB&#39;, endColorstr=&#39;#F4F4F4&#39;,GradientType=0 );
background: linear-gradient(top, #fbfbfb 0%,#f4f4f4 100%);
}
#Techsemo-widget {
width: 545px;
padding: 10px 20px 5px 0px;
margin:15px 10px -15px 3px;
-moz-border-radius: 10px 10px 10px 10px;
-webkit-border-radius: 10px 10px 10px 10px;
-goog-ms-border-radius: 10px 10px 10px 10px;
border-radius: 10px;
background: none repeat scroll 0 0 transparent;
border: 1px solid #D3D3D3;
-moz-transition: all 0.3s ease-out;
-o-transition: all 0.3s ease-out;
-webkit-transition: all 0.3s ease-out;
-ms-transition: all 0.3s ease-out;
transition: all 0.3s ease-out;
-webkit-box-shadow: inset 0px 0px 8px rgba(50, 50, 50, 0.75);
-moz-box-shadow: inset 0px 0px 8px rgba(50, 50, 50, 0.75);
box-shadow: inset 0px 0px 8px rgba(50, 50, 50, 0.75);
-webkit-box-shadow: inset 0px 5px 0px 0px #D8D8D;
}
#Techsemo-widget:hover {
background: none repeat scroll 0 0 #FFF;
-moz-box-shadow: 1px 1px 2px #CCC inset;
-webkit-box-shadow: 1px 1px 2px #CCC inset;
box-shadow: 1px 1px 2px #CCC inset;
}
#Techsemo-widget td {
padding: 3px 0;
}
</style>
<center><br/><div id='Techsemo-widget' style='width: 545px;padding: 10px 20px 5px 0px;margin:15px 10px -15px 3px;-webkit-border-radius: 10px 10px 10px 10px;border-radius: 10px;border: 1px solid #D3D3D3;-webkit-transition: all 0.3s ease-out;'>
<div id='emailwidget'>
<table style='border:none; margin: 0px 0px 0px 0px; padding: 0px 0px 0px 0px;' width='100%'>
<tbody>
<center><span style='font-style: italic; font-size: 30px; font-family: arial,sans-serif, verdana; color:#FF6894;'>Do you Like this story...?</span></center>
<tr style='border:none; margin: 0px 0px 0px 0px; padding: 0px 0px 0px 0px;'>
<td align='left' style='border:none; margin: 0px 0px 0px 0px; padding: 0px 0px 0px 0px;'>
<p style='color:#666; font-weight: bold; font-size: 18px; margin:0px 0px 5px 0px;font-family:salsa;'>
Get free email updates daily!
</p>
<form action='http://feedburner.google.com/fb/a/mailverify' class='feedburner' method='post' onsubmit='window.open(&apos;http://feedburner.google.com/fb/a/mailverify?uri=techsemo&apos;, &apos;popupwindow&apos;, &apos;scrollbars=yes,width=550,height=520&apos;);return true' style='margin: 0pt;' target='popupwindow'>
<input name='uri' type='hidden' value='techsemo'/>
<input name='loc' type='hidden' value='en_US'/>
<input class='Techsemostyle' name='email' onblur='if (this.value == &quot;&quot;) {this.value = &quot;Enter your email...;;}' onfocus='if (this.value == &quot;Enter your email...;) {this.value = &quot;&quot;}' type='text' value='Enter your email...'/>
<input alt='' class='Techsemosubmit' title='' type='submit' value='Submit'/>
</form>
</td>
<td style='border:none; margin: 0px 0px 0px 0px; padding: 0px 0px 0px 0px;'>
<p style='color:#666; font-weight: bold; font-size: 18px; margin:0px 0px 5px 0px;font-family: salsa; '>
Follow us!
</p>
<a href='http://www.facebook.com/techsemo' rel='nofollow' target='_blank' title='Follow us on Facebook'><img alt='Facebook widget' src='http://4.bp.blogspot.com/-gTst-jORixk/UEJSAvM-DSI/AAAAAAAADUg/5KPCCMbnplk/s1600/Techsemo_Facebook.png'/></a>
<a href='http://twitter.com/Techsemo' rel='nofollow' target='_blank' title='Follow us on Twitter'><img alt='Twitter widget' src='http://3.bp.blogspot.com/-jiVqvkdIPzU/UEJSFaewQKI/AAAAAAAADVA/q5UbvpyA4JM/s1600/Techsemo_Twitter.png'/></a>
<a href='https://plus.google.com/101743064150238728712/' rel='nofollow' target='_blank' title='Follow us on Google+'><img alt='Google+ widget' src='http://2.bp.blogspot.com/-Y2e_JnBPrHY/UEJSBlbko3I/AAAAAAAADUo/gkPC5kMf7gY/s1600/Techsemo_Google+.png'/></a>
<a href='http://www.linkedin.com/groups/TechSemo-4536523' rel='nofollow' target='_blank' title='Follow us on Linkedin'><img alt='Linkedin widget' src='http://1.bp.blogspot.com/-u4CKDNEUHXs/UEJSC2VQI6I/AAAAAAAADUw/mjeJruxvuFg/s1600/Techsemo_Linkedin.png'/></a>
<a href='http://www.pinterest.com/techsemo' rel='nofollow' target='_blank' title='Follow us on Pinterest'><img alt='Pinterest widget' src='http://2.bp.blogspot.com/-bGPLYQBRHNg/UEJR-ZnRzcI/AAAAAAAADUQ/TunyEGq_qmc/s1600/Techsemo-Pinterest.png'/></a>
<a href='http://techsemo.stumbleupon.com/' rel='nofollow' target='_blank' title='Follow us on Stumbleupon'><img alt='Stumbleupon widget' src='http://2.bp.blogspot.com/-effreJfOG8E/UEJR_ekF9SI/AAAAAAAADUY/TShvs4LB4zk/s1600/Techsemo-Stumbleupon.png'/></a>
</td>
</tr>
</tbody>
</table>
<div align='right'>
<span style='font-style: italic; font-size: 8px; color: solid #ffffff;'><a href='/search/label/Widget' style='text-decoration: none;' target='_blank'><font color='#000' decoration='none'>[widgets]</font></a></span>
</div>
<iframe allowtransparency='true' frameborder='0' scrolling='no' src='//www.facebook.com/plugins/like.php?href=http%3A%2F%2Fwww.facebook.com%2Ftechsemo&amp;send=false&amp;layout=standard&amp;width=450&amp;show_faces=true&amp;action=like&amp;colorscheme=light&amp;font=verdana&amp;height=65' style='border:none; overflow:hidden; width:450px; height:65px;'>
</iframe>
<div><tr>
<a class='twitter-follow-button' href='http://twitter.com/techsemo' rel='nofollow'/>
<script src='http://platform.twitter.com/widgets.js' type='text/javascript'/></tr>
<tr><a href='http://www.pinterest.com/techsemo/'><img alt='Follow us on Pinterest' height='28' src='http://2.bp.blogspot.com/-xv_w2p0teck/UFyrcc-M4LI/AAAAAAAADsM/VT5C0Rt0StQ/s1600/follow-us-on-pinterest-button.png' width='169'/></a></tr>
</div>
</div>
</div>
</center>
</b:if>
Now Change All Blue Colored Text With the Help of Instructions Below:
  • To change the color of the "Do you like this story...?" text then simply search for color code #FF6894 and replace with a hexadecimal color of your choice.
  • Now replace http://feedburner.google.com/fb/a/mailverify?uri=techsemo with your Feedburner Email Feed link. You can get it by visiting your feedburner account then navigate to Publicize and then to Email Subscriptions.
  • Replace the http://www.facebook.com/techsemo with your Facebook Like Page link
  • Replace the http://twitter.com/Techsemo with your twitter link on both social icon and follow button
  • Replace the https://plus.google.com/101743064150238728712/ with your Google Plus link
  • Replace the http://www.linkedin.com/groups/TechSemo-4536523 with your Linkedin Group link
  • Replace the http://www.pinterest.com/techsemo with your Pinterest link on both social icon and follow button
  • Replace the http://techsemo.stumbleupon.com/ with your Stumbleupon link
After you have made all the necessary changes simply save your template and Click Preview button to check and you are all done!

Important: Please take a backup before every changes of your template. Because the backup could recover your template from any error while editing or adding widgets.

This Widget for Blogger would display on post pages only and it wont display on homepage. You can surely ask for our help which would be no less than a pleasure. Please ask us any query you may have in the comment section below.
 

Fast Loading Floating Social Sharing Widget for Blogger

The Floating Social Sharing widget is most important for every blog, Because readers of a blog can share our articles to there friends easily. Here in this widget we have integrated top social websites via ShareThis service. The list of social websites are Facebook, Twitter, Linkedin, Stumbleupon, Pinterest and Reddit.
Fast Loading Floating Social Sharing Widge

How to Add Floating Bar To Blogger - 9 Easy Steps to Follow
  1. Go to Blogger and Template
  2. Backup your template and Save it into your machine
  3. Click Edit HTML
  4. Check the Expand Widget Templates Check box
  5. Search for the code: <b:includable id='post' var='post'>
  6. Just below Code paste the following code:
<b:if cond='data:blog.pageType == &quot;item&quot;'>
<b:if cond='data:blog.pageType != &quot;static_page&quot;'>
<style>
.Techsemo_social_floating{
position:fixed; bottom:15%; margin-left:-60px; float:left;
    width:60px;
    background-color:#f7f7f7;
    padding: 5px;
     border-top:1px solid #ddd;
border-left:1px solid #ddd;
border-bottom:1px solid #ddd;
z-index:9999px !important;
border-radius:5px;-moz-border-radius:5px;-webkit-border-radius:5px;
}
</style>
<div class='Techsemo_social_floating'>
<div Class='FShare' style='border-bottom:1px dotted#E2E2E2;padding:0.1em 0 0.2em 0.1em;'><span class='st_facebook' displayText='Share'/></div>
<div Class='Tweet' style='border-bottom:1px dotted#E2E2E2;padding:0.1em 0 0.2em 0.1em;'><span class='st_twitter' displayText='Tweet' st_via='techsemo'/></div>
<div Class='InShare' style='border-bottom:1px dotted#E2E2E2;padding:0.1em 0 0.2em 0.1em;'><span class='st_linkedin' displayText='Share'/></div>
<div Class='Stumble' style='border-bottom:1px dotted#E2E2E2;padding:0.1em 0 0.2em 0.1em;'><span class='st_stumbleupon' displayText='Stumb'/></div>
<div Class='Reddit' style='border-bottom:1px dotted#E2E2E2;padding:0.1em 0 0.2em 0.1em;'><span class='st_reddit' displayText='Reddit'/></div>
<div Class='Pinit' style='border-bottom:1px dotted#E2E2E2;padding:0.1em 0 0.2em 0.1em;'><span class='st_pinterest' displayText='Pinit'/></div>
<div Class='More' style='border-bottom:1px dotted#E2E2E2;padding:0.1em 0 0.1em 0.1em;'><span class='st_sharethis' displayText='More'/></div>
<div Class='Get This' style='padding:0.1em 0 0.1em 0.1em;'><a href="/search/label/Widget">Widget</a></div>
</div>
</b:if></b:if>
     7.  Search for the code: </head>
     8.  Just above Code paste the following code:
<script type='text/javascript'>var switchTo5x=false;</script>
<script src='http://w.sharethis.com/button/buttons.js' type='text/javascript'/>
     9. Save your template and enjoy - You are done!

Just replace techsemo with your twitter username. 

Important: Please take a backup before every changes of your template. Because the backup could recover your template from any error while editing or adding widgets.

This Fast Loading Floating Social Sharing Widget for Blogger would display on post pages only and it wont display on homepage and Other pages. You can surely ask for our help which would be no less than a pleasure. Please ask us any query you may have in the comment section below.
 

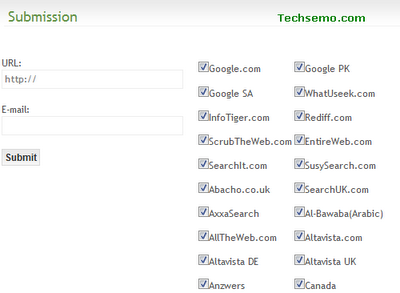
Online Tool to Submit your Blog/Website to 140 Engines/Directories

Search Engine's are very important to get more traffic for Blogs and Websites. Because Internet users use search engine to find information that they wanted. There are huge list of search engines available on Internet. If you submit your site to these search engines one by one, it is not a easy process and takes lots of time. What we want to do for this, we search through the Internet and finally got an online tool by Rank On Top Online to submit your Blog/Website to 140 Engines/Directories at a time.

Online Tool to Submit your Blog/Website to 140 Engines/Directories

How to Submit:
  1. Go to this Rank On Top Online website and give your Blog/Website URL and Email Id (Do not enter your main/personal e-mail address, because you may recieve spam messages).
  2. Before you submit, make sure your Blog/Website is online and functioning.(no under construction pages).
  3. You can deselect the search engines that you do not want to submit your Blog/Website.
  4. Finally hit the submit button wait until submission completed.
  5. Some search engines may require your e-mail confirmation for submission check your Inbox after submission.
Note: After submission of your Blog/Website wait for the conformation. For a better ranking repeat the operation every 3-4 weeks but not sooner !.(you may get banned)
 
 
Copyright © 2012 - 2016. TechSemo - All Rights Reserved.
Techsemo Facebook Techsemo Google Plus Techsemo Twitter Techsemo Stumbleupon Techsemo Linkedin Techsemo Pinterest Techsemo RSS